Friday, 13 September 2013
Monday, 6 September 2010
Paper cards


In the final process of creating the card images I have decided to go back to the original plan of creating 50 images, 10 for each card area which I had thought originally was a little ambitious.
The other issue that has manifested itself has been that although all the images join up nicely, when they are shuffling in to position it's not evident that they are cards as they are too seamless! I've had to add a card or paper overlay so that they appear to be cards as the original victorian cards would have been.
Thursday, 1 July 2010
3 new backgrounds created
It's turning out to be a slow process as usual! The original intention to create 50 unique images, 1 for each bay multiplied by the number in the array (10) has been changed.
So there originally was going to be 5 images that join x by 10 options. The change has been for two reasons, the first is the complexity of using photographs, each image has to join perfectly and it's incredibly time consuming. The second reason was the way the card values are used to control the image, initially I didn't want the images repeating, which explains the 50 cards, my concern was that it may not have been evident that there was a direct relationship to the card value and the image itself, whereas with only 10 cards in total now the card number when repeated in the sequence would show the same card in the joined up sequence.
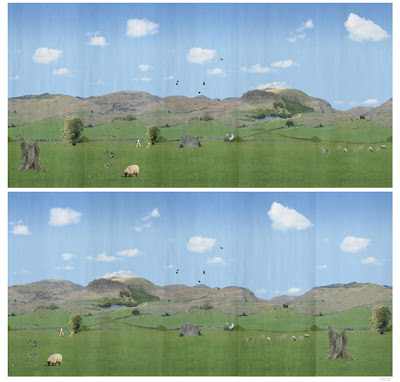
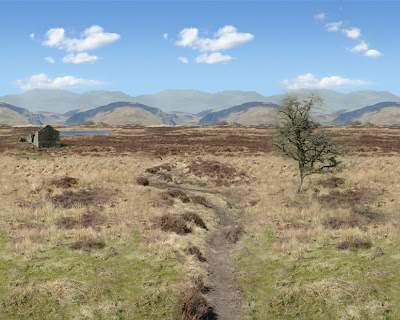
(3 images below created with new background images for test purposes)
So there originally was going to be 5 images that join x by 10 options. The change has been for two reasons, the first is the complexity of using photographs, each image has to join perfectly and it's incredibly time consuming. The second reason was the way the card values are used to control the image, initially I didn't want the images repeating, which explains the 50 cards, my concern was that it may not have been evident that there was a direct relationship to the card value and the image itself, whereas with only 10 cards in total now the card number when repeated in the sequence would show the same card in the joined up sequence.
(3 images below created with new background images for test purposes)
 Other issues to note:-
The grass has been colour balanced with the background fields and the grass now repeats perfectly and no longer shows the joins.
A shrub and hedge has been placed left and right in order to seperate and join the 2 fields, this adds a visual illusion of depth but also allows for other elements to be added around it.
The foreground needs some work, the linear feel needs some working on. a zigzag 'Z' of images may be introduced to break the horizontal.
The sky will need to be sorted at the end of this process to get the clouds in the correct position to make it seem accurate to the scene.
The development images created in photoshop are now been stored on the online Microsoft Skydrive account so that I have access to them wherever I am, this also seems pretty stable and a secure place to backup to also.
Monday, 26 April 2010
Development of the image

This image defines the process of creating the original template for the Myriorama.
Sunday, 25 April 2010
3 images combined stage 2

... and this is the result of working out the next stage, the foreground is still a little bit wrong but it's now got a foreground, midground and background which allows for more development in each area. The size of each panel has also been increased to 275 x 660px, still small but allows for greater movement of components.
Clouds also introduced. The background is a continuous colour gradient in photoshop (#a7d2f4 to #669cda) with the clouds dropped over.
3 images combined
3 images combined to create the first stage of the Myriorama, although this seems to now be working the limitations of a flat foreground and no midground has limited the use of this images as a base template. only foreground images can be added as the background is too distant.
With 50 images required to complete the project, this image is no longer suitable. This has been frustrating as it's taken a day to take the images and at least another day in photoshop to align all the components. I was up until 1am last night and it's now back to the drawing board.
On the plus side, I've learned a lot through a number of mistakes!

Tuesday, 30 March 2010
Scale...

Big sheep, little sheep! Same size sheep!
Scale and perspective is going to be critical. This is something I hadn't factored in yet.
Subscribe to:
Posts (Atom)